Pizza Dough

Ingredients
345g 00 Grade Pizza Flour
1 Teaspoon Honey
1/4 Teaspoon Dried Active Yeast
215ml / g Warm Water
10g Salt
8g Extra Virgin Olive Oil
This Pizza Dough recipe uses just a few ingredients, but yields a delicious dough that rises beautifully. It should be made at least 1 day in advance, but ideally up to 3 - with each day the dough improves - so we recommend that you make some immediately after placing your order for your Crust King Baking Steel, so that your dough's ready as soon as it arrives!
This recipe yields 2 dough balls, each weighing approximately 290g, suitable for a 12" pizza (depending on how thin you like your crust). The recipe can be scaled for different quantities.
Instructions

1. Add the Warm Water to a large mixing bowl - or the bowl of a stand mixer if you have one. Make sure to do so accurately, either using a measuring jug, or better yet a set of digital scales (did you know that 1 gram of water is the same as 1ml?).
It is important that the water is still comfortable to touch, any hotter and you risk killing the yeast once it is added.

2. Add the Honey and mix briefly with a spoon to ensure that it is dissolved in the water before adding the Yeast.

3. Add the Yeast and mix it into the water. It doesn't have to fully dissolve, and it's okay if a few strands get stuck to the side of the bowl, as long as the majority of it is incorporated.

4. The mixture should look like this immediately after mixing. Leave this to stand for 10 - 15 minutes.

5. After this time, the Yeast should have started to foam and appear pillowy - in my example you can see that it formed a ring on the water's surface.
This is a process known as blooming, where the Yeast is activated and starts to eat the sugar that's in the Honey. This is how you know that your Yeast is alive, and that the dough is going to be a success. If the Yeast doesn't bloom, then you'll have to buy more; using dead yeast will not work, and your crust won't rise.

6. Once bloomed, add the 00 Grade Flour to the Water / Yeast mixture, again, using scales in order to do so precisely.

7. Then you can start to mix. If doing this by hand you can begin by using a wooden spoon or something similar, particularly whilst the dough is very sticky.
If using a stand mixer, use the dough hook attachment and begin to mix on low speed for 2 minutes.
Once the 2 minutes is over, stop mixing and scrape down the sides of the bowl to make sure everything's incorporated.

8. Start mixing again for another 2 minutes, and gradually add the Salt.
Once the 2 minutes is over, stop mixing again, and scrape down the sides of the bowl once more.

9. Cover the bowl with a tea towel and leave it out on your work surface for 30 minutes to hydrate.
If doing so without a stand mixer, it's likely that at this point you will find it easier to swap from using a wooden spoon, to using your hands.

10. Start mixing again for a further 4 minutes, whilst gradually adding the Extra Virgin Olive Oil.
This will be tricky to incorporate if doing so by hand, and may require closer to 8 minutes of kneading.
11. Rest the dough in its mixing bowl with a tea towel covering it for 30 minutes. Once the time is up, knead the dough for a further 2 minutes before resting again. Do this 3 times in total, so that the dough has been kneaded for an additional 6 minutes.
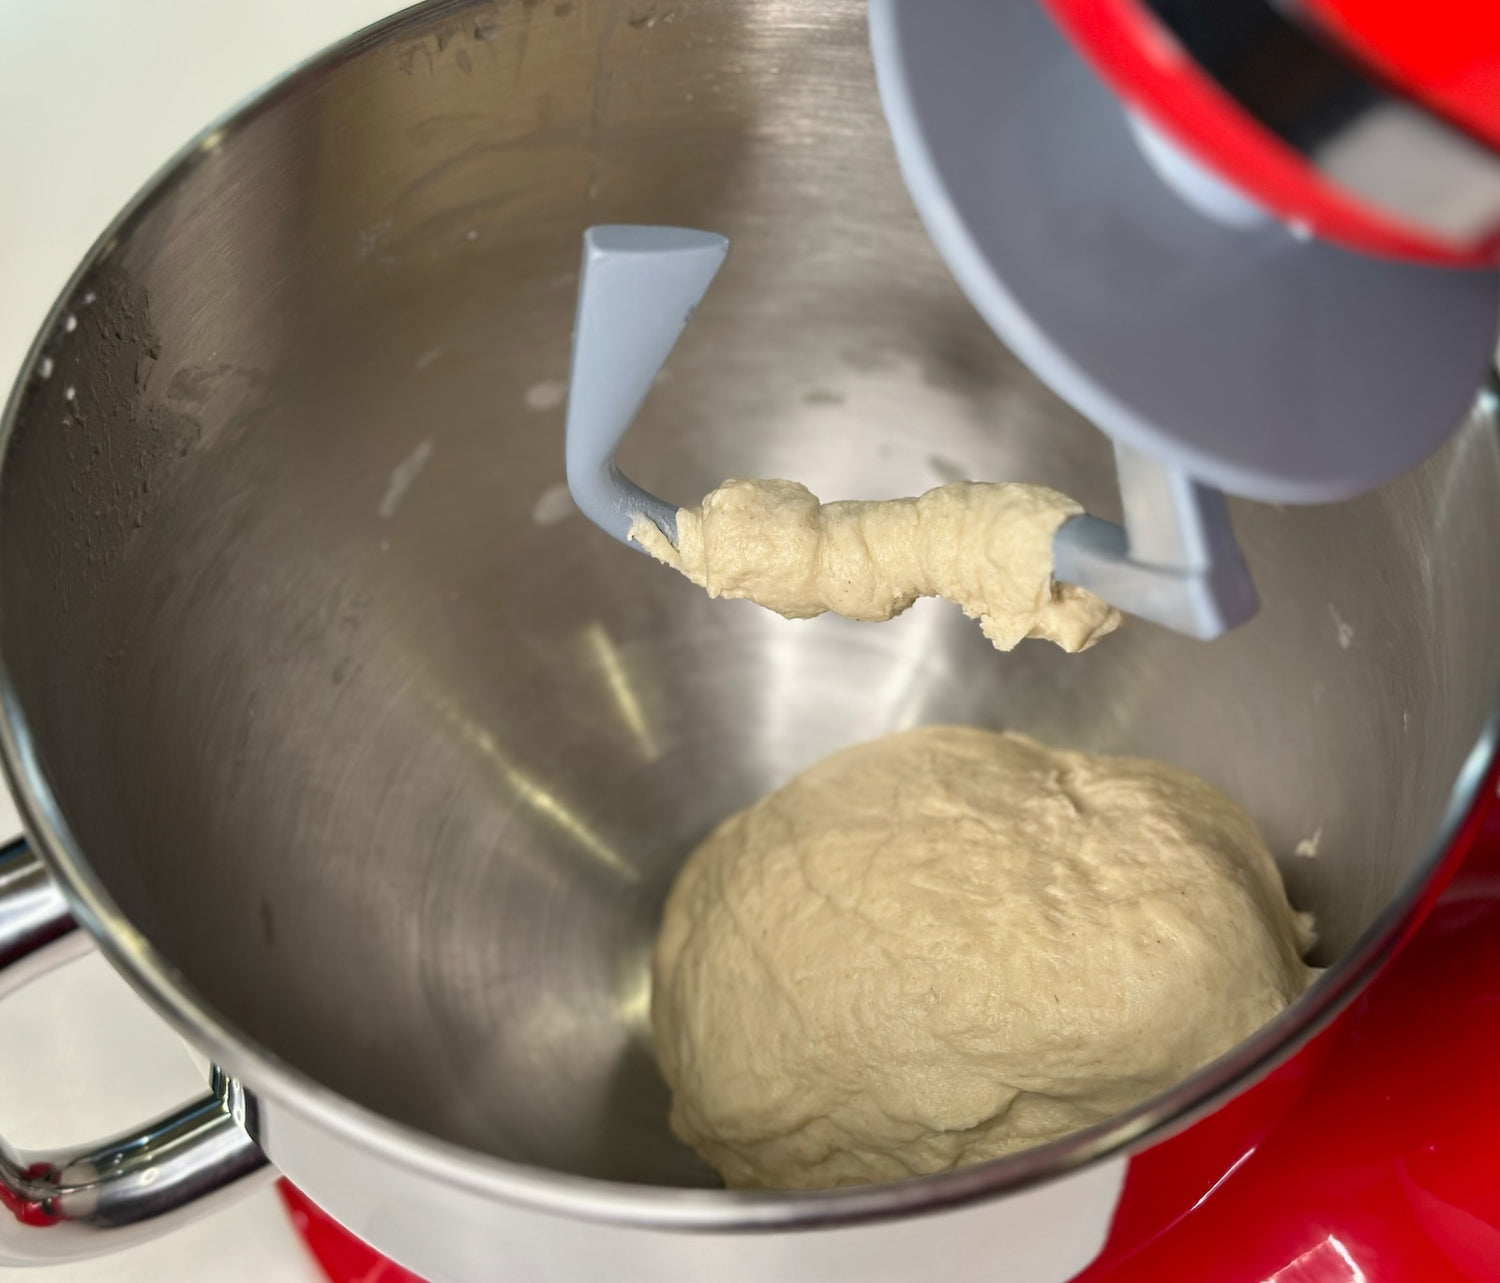
The image shows my dough after all the additional mixing, once it has become very elastic.

12. Take the dough in your hands and form it into one large ball - if you coat your hands in a bit of Oil first, this helps prevent it from sticking to you.
Separate it into two evenly sized pieces and roll these into smaller balls, tucking the open ends of the dough underneath so that the outer surface appears smooth and free of tears.

13. Lightly brush Oil over the insides of individual bowls or plastic containers that you will then place each dough ball in to. Cover the bowls tightly with cling film or use the lids for the plastic containers.
Place these in the fridge to cold ferment for a minimum of 1 day. 2 days is better still, but you should expect the best results from waiting for 3.

14. Keep the dough in the fridge until you're ready to make your pizza, as I find this makes it easier to handle.
The gluten that develops in this dough results in a very high elasticity, meaning it can withstand stretching in the air (if you're brave enough to try). I prefer the gravity stretch method, where you pinch the dough (gripping the centre, not the edges) and lift it, so that gravity stretches and pulls it back down to the surface. Then rotate and repeat until you have a vaguely circular shape.

15. Once you've done the majority of your stretching, you can lay the dough back down onto your well floured surface or peel, and continue stretching and shaping there until it reaches the desired shape and thickness.
Once stretched, your dough is ready to receive sauce and toppings before being placed in the oven on your pre-heated Crust King Baking Steel!